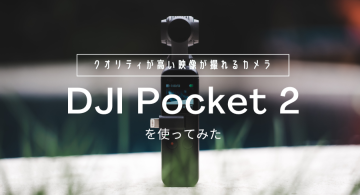
ソフトウェア & サービス
Installing Magic Lantern on Canon EOS 7D
Peter Kudry
Even though the previous blog post mentioned that the next couple of issues from me will be about build details of our office gadgets, in this issue, I would like to write about:
Magic Lantern, a free software add-on that runs from the SD/CF card and adds a host of new features to Canon EOS cameras that weren’t included from the factory by Canon
Disclaimer: The author of this post, Magic Lantern and anybody from their community or development team, and most importantly Eyes, JAPAN is not responsible for damage of any kind to you, your camera or any other equipment you use if you decide to follow the steps in this article.
Now that we have that out of way, let me introduce you to Magic Lantern. As mentioned above, Magic Lantern is a community developed, open-source add-on that runs from your media storage. It does not modify the cameras firmware rather it will enable the BOOTDISK flag in your camera’s Flash ROM, allowing it to load and execute custom code from the memory card.
The main features of Magic Lantern and supported cameras are listed on their homepage.
We decided to use a Canon EOS 7D as the guinea pig as it is fully supported and this camera has not been used in our office for quite a while.
The Magic Lantern build for the 7D can be downloaded from here.
The installation instructions written on the above-linked page seem quite simple:
1. Make sure you are running Canon firmware 2.0.3
2. Once you have the correct Canon firmware:
- Format the card from the camera.
- Unzip the archive and copy ML files to the memory card.
- Run the Firmware Update process from Canon menu.
This procedure will enable the BOOTDISK flag in your camera’s Flash ROM, allowing it to load and execute custom code from the memory card. A copy of the original (unmodified) ROM contents will be saved to the card.Magic Lantern will run from this card; it won’t replace your original firmware.3. After installation, please copy your ROM backup files (ML/LOGS/ROM*.BIN on the card) to a safe place.
As our camera was not running the supported firmware, we needed to downgrade it from version 2.0.5 to 2.0.3. Different cameras may require a use of some sort of a trick in case the firmware cannot be downgraded via copying the lower version firmware onto a storage media and running the firmware “update” from camera’s menu. Even though the 7D does not require such, a good example was mentioned in this forum thread where one has to use an EOS Utility software (recommended version 2.x) to painlessly downgrade the firmware.
To confirm that this method will work, I chose to do the downgrade via the utility anyway. However, to find the utility was quite a painful process. Canon does not provide the full version of EOS Utility as a stand-alone downloadable package from their website, rather provide only updater to the latest version of this software, stating in their documentation that one has to install the full version from CDs that came with the camera. I mean, obviously everyone saves every driver/utilities CD that comes with their devices… But I digress. Luckily, one can download the “EOS Digital Solution Disk Software 29.1A for Windows” from Canon USA’s website after selecting the target platform being Windows 7 (x64). Another catch ; after clicking the ‘Download’ button, one will be prompted to enter the camera’s serial number in order for the download to begin.. Then one can download an updater (‘EOS Utility 2.14.20a Updater for Windows’) and update to version which can run on Windows 10 64-bit or newer.
The following link will help you find the above-mentioned packages. Just do not forget to switch between Windows 7 and Windows 10 platforms, as well as different MacOS versions to find the EOS Utility.
After installing it and confirming that the ‘Camera settings/Remote shooting’ feature works, you can proceed to download the 2.0.3 firmware from here. The zip archive contains update (or downgrade in this instance) instructions in multiple languages, so for further instructions about the downgrade, refer to the guides within the downloaded package.
When we finally had the camera running the correct firmware version, we could continue with the step 2 from the original instructions. I formatted the card using the camera, and realized that I do not have a memory card reader with Compact Flash slot. As it is impossible to transfer the Magic Lantern files through the EOS utility while the camera is connected to a PC or via regular Windows Explorer or Finder, one has to get a card reader supporting the camera’s media storage.
Then simply plug in the card to the card reader and copy the extracted Magic Lantern files to its root. Plug the card back into the camera and run the firmware update from within the camera. Do not forget to have the camera in any other mode than automatic and have it set to shooting stills rather than recording videos.
And lastly, do not forget the third step! Make sure, you back up the original ROM files to a safe place.
You are done! Enjoy using your camera with extended features and tweaks.
The entirety of Eyes, JAPAN’s staff wishes you safe and fruitful photography adventures.
Useful links and references:
Magic Lantern Nightly – Install Guide
- Tweet
-

 2022/09/02
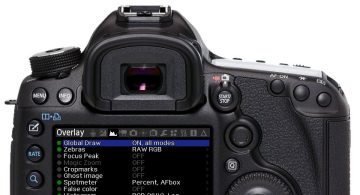 2022/04/15
 2017/07/27
 2012/08/23
 2012/06/29
 2012/02/09